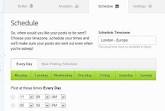
In this article, how to schedule your posts in WordPress is presented step by step. Every site has a definite time in a day of getting the highest number of users. So, posting article in a different time can cause problem. Again, before going to a vacation, you may not want to stay away from your blog. In such cases, scheduling posts becomes handy. By scheduling your posts in WordPress, you may stay ahead. The scheduled articles will be published mechanically.
How to Schedule Your Posts in WordPress
Login to your WordPress account and find out plugins. Install Drafts Scheduler plugin and activate it. After setting up the plugin, click on the Posts tab which is available on the left hand side of Dashboard. You will find “Draft Scheduler”. Click on “Draft Scheduler” to open up all the options.
To select a post type to schedule, go to “Post Type to Schedule” and press the drop down menu. You will find items (Posts, Pages etc) to choose. The “Schedule Start Date” provides you a calendar to choose time of posting your articles.
As you have figured out the schedule of your first post, you can proceed to specify the posting order. You may send your posts randomly or sequentially. Go to the Posting Order section to select random or sequential option.
The Post Interval option is to set the interval you like to put in between the scheduled posts to be published.
Then, select the Schedule Drafts button which is available at the bottom to complete the course.
You may modify or completely disable the schedule. To disable, go to the main plugin page and select the Undo Schedule button.


